How to Connect Tenderlake to Microsoft Teams using Workflows
A step-by-step guide to connecting Tenderlake folders to Microsoft Teams channels using the new Microsoft PowerAutomate.
A step-by-step guide to connecting Tenderlake folders to Microsoft Teams channels using the new Microsoft PowerAutomate.
Microsoft announced the retirement of Office 365 connectors in Microsoft Teams. You can read the full announcement here: https://devblogs.microsoft.com/microsoft365dev/retirement-of-office-365-connectors-within-microsoft-teams/
Previously, Office 365 connectors had been the way for an app to integrate with Microsoft Teams, enabling apps to send useful information, such as a new procurement notice, into a Teams channel.
Microsoft Power Automate is now the tool for replacing Office 365 connectors. Power Automate is a tool from Microsoft which helps automate tasks and workflows.
Starting from the 15th August 2024, you will need to use Microsoft Teams workflows via Power Automate to deliver procurement notices from Tenderlake to Microsoft Teams.
Detailed instructions on setting up a new workflow between Tenderlake and Microsoft Teams channels are provided in the step-by-step guide below.
Current Office 365 connectors were intended to shut down in October, 2024. However, after customer feedback to Microsoft regarding the short timeframe, Microsoft has pushed the shutdown date to 31st December, 2024.
If you have any Office 365 connectors between Tenderlake and Microsoft Teams, they will need to be replaced using Microsoft Teams workflows before 31st December 2024.
Here is a step-by-step guide to connecting Tenderlake to Microsoft Teams channels using Microsoft Teams workflows via Power Automate.
How to Connect Tenderlake to Microsoft Teams using Workflows via Power Automate.
There is also a video to help you follow these steps which you can watch here.
In order to send procurement notices from Tenderlake to a Microsoft Teams Channel, you need to create a webhook (a special link) for the specific Teams Channel you want to send the notices to and add the webhook to Tenderlake.
Follow the steps below to create a new connector between Tenderlake and a Microsoft Teams channel.
1/
In Microsoft Teams, right-click on the channel you want to send procurement notices to. A menu will appear, and you select “Workflows”.

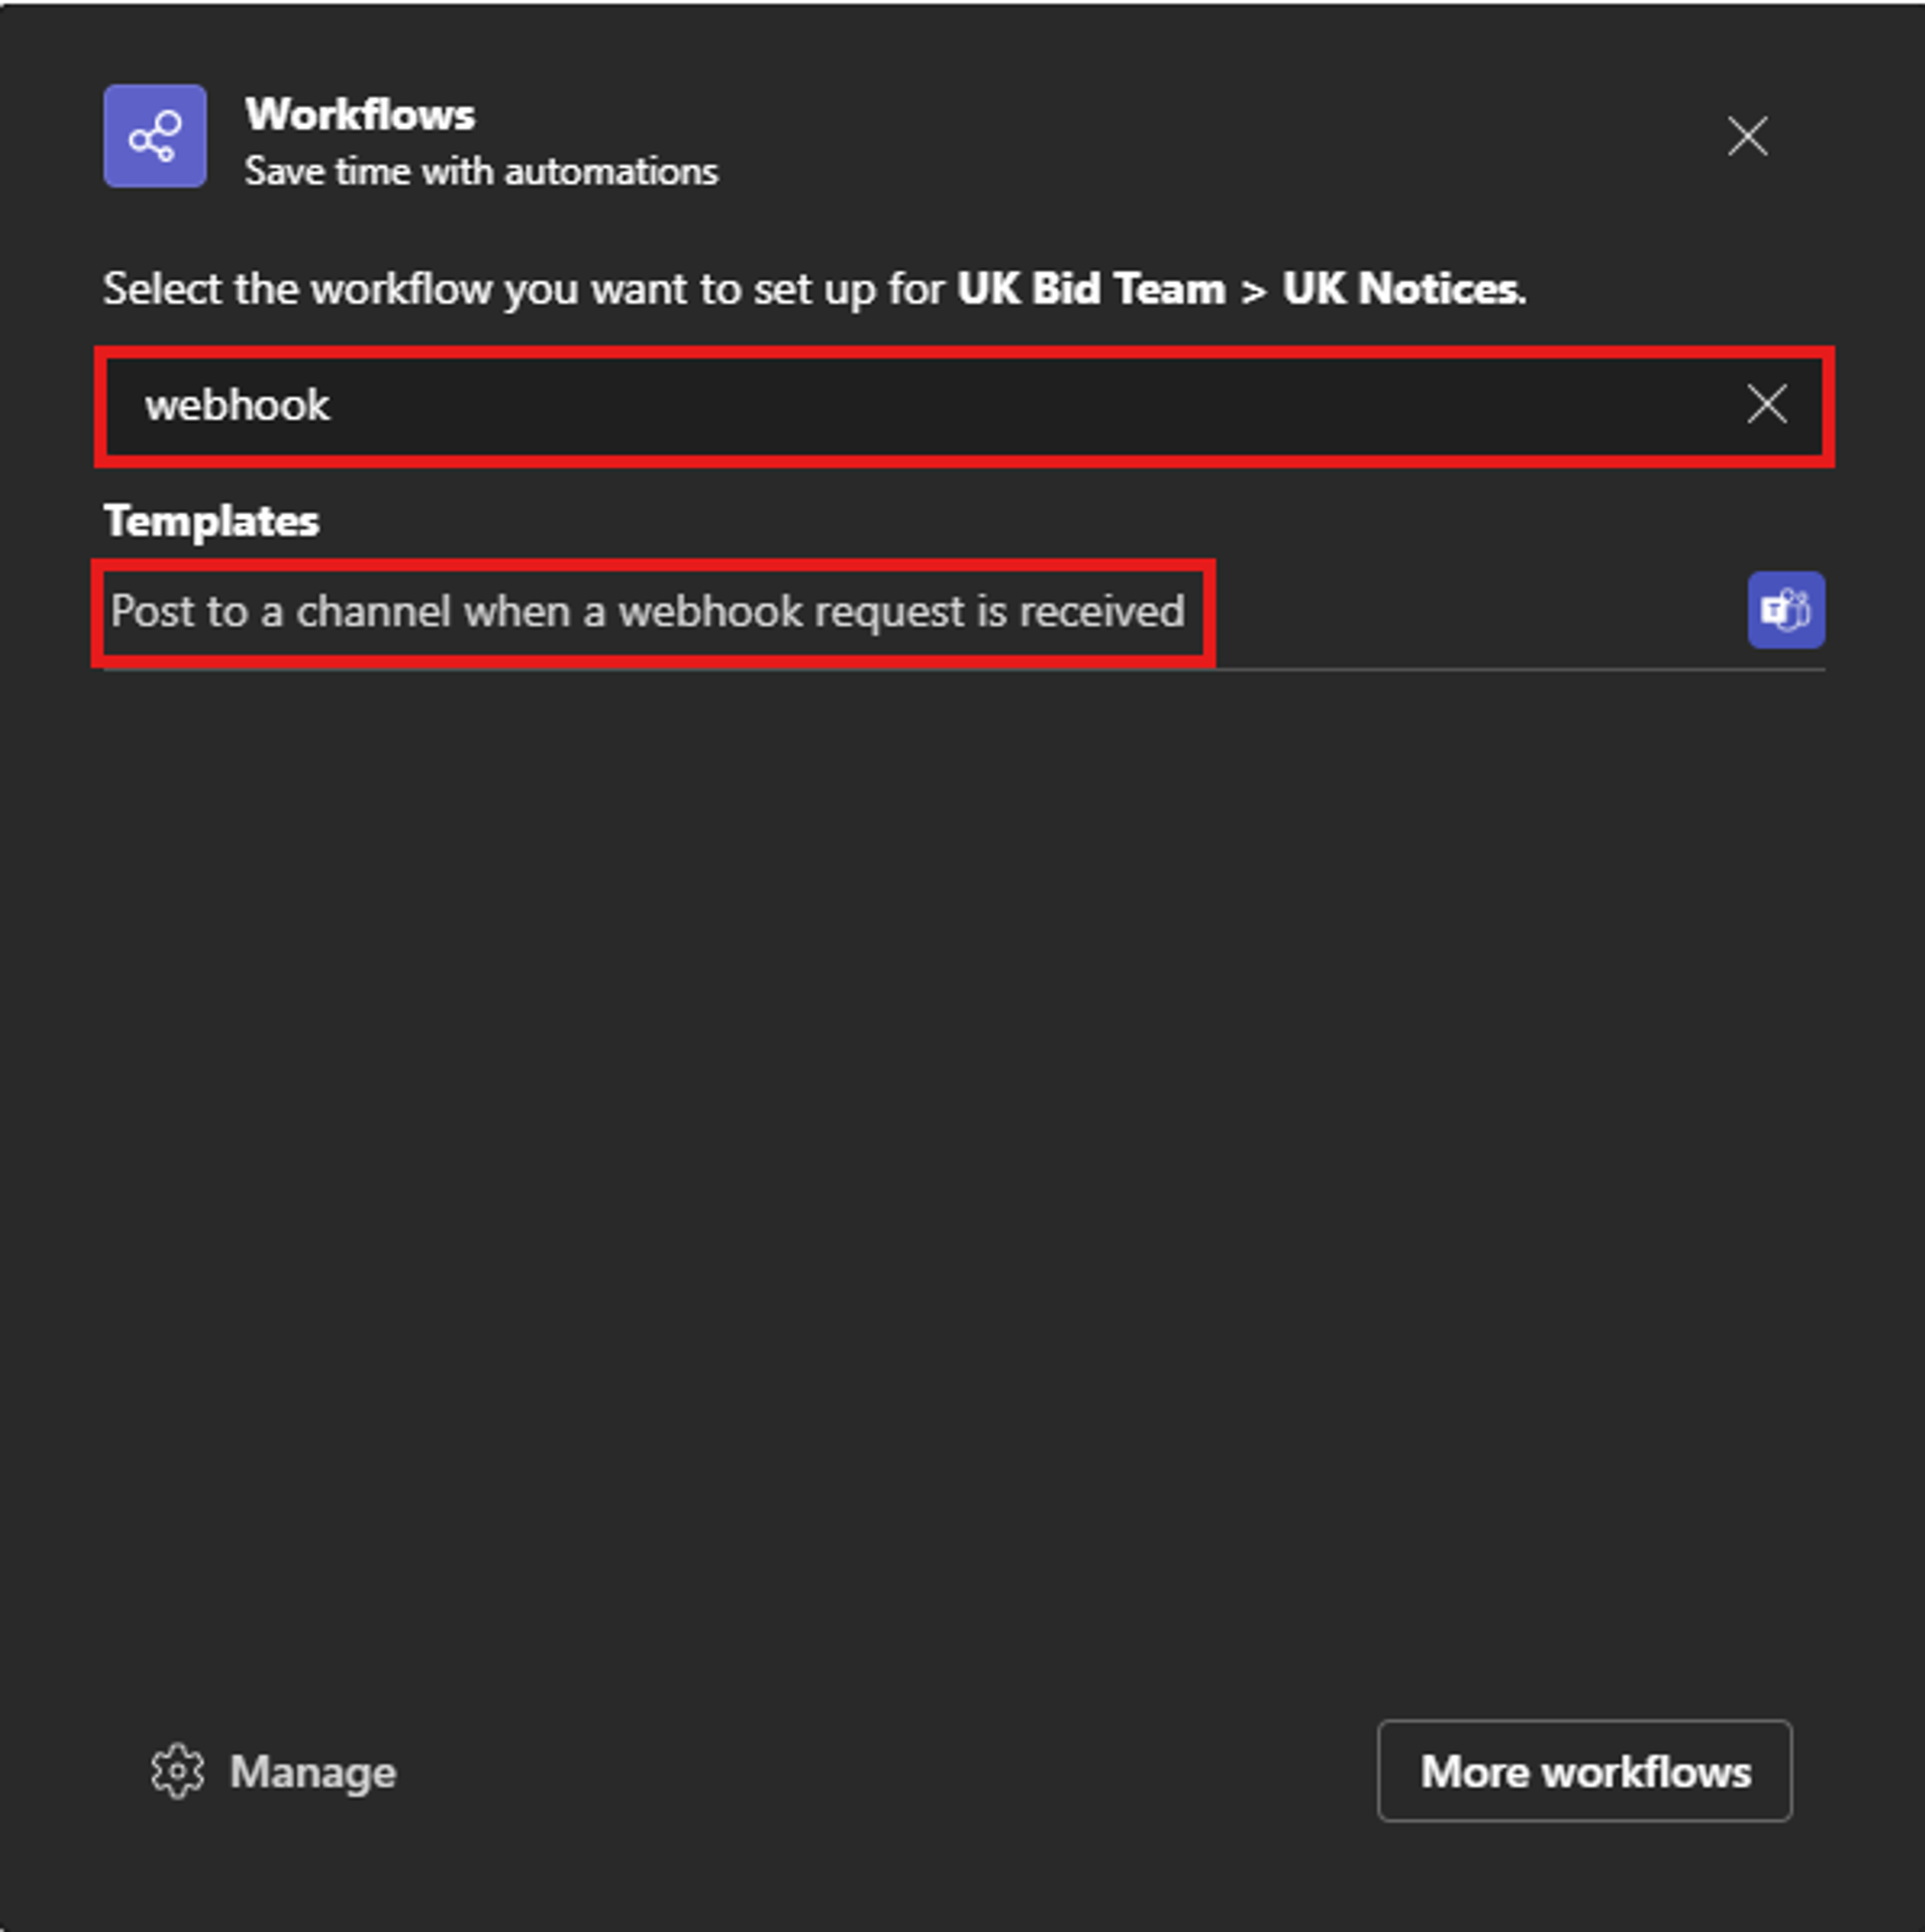
2/
A pop-up window will appear.
Start typing “webhook” in the search box (highlighted below) until you see the “Post to a channel when a webhook request is received”.
Click on the text to add a webhook to this channel.
3/
Confirm you want to add a new webhook by clicking the "Next" button. (see below)

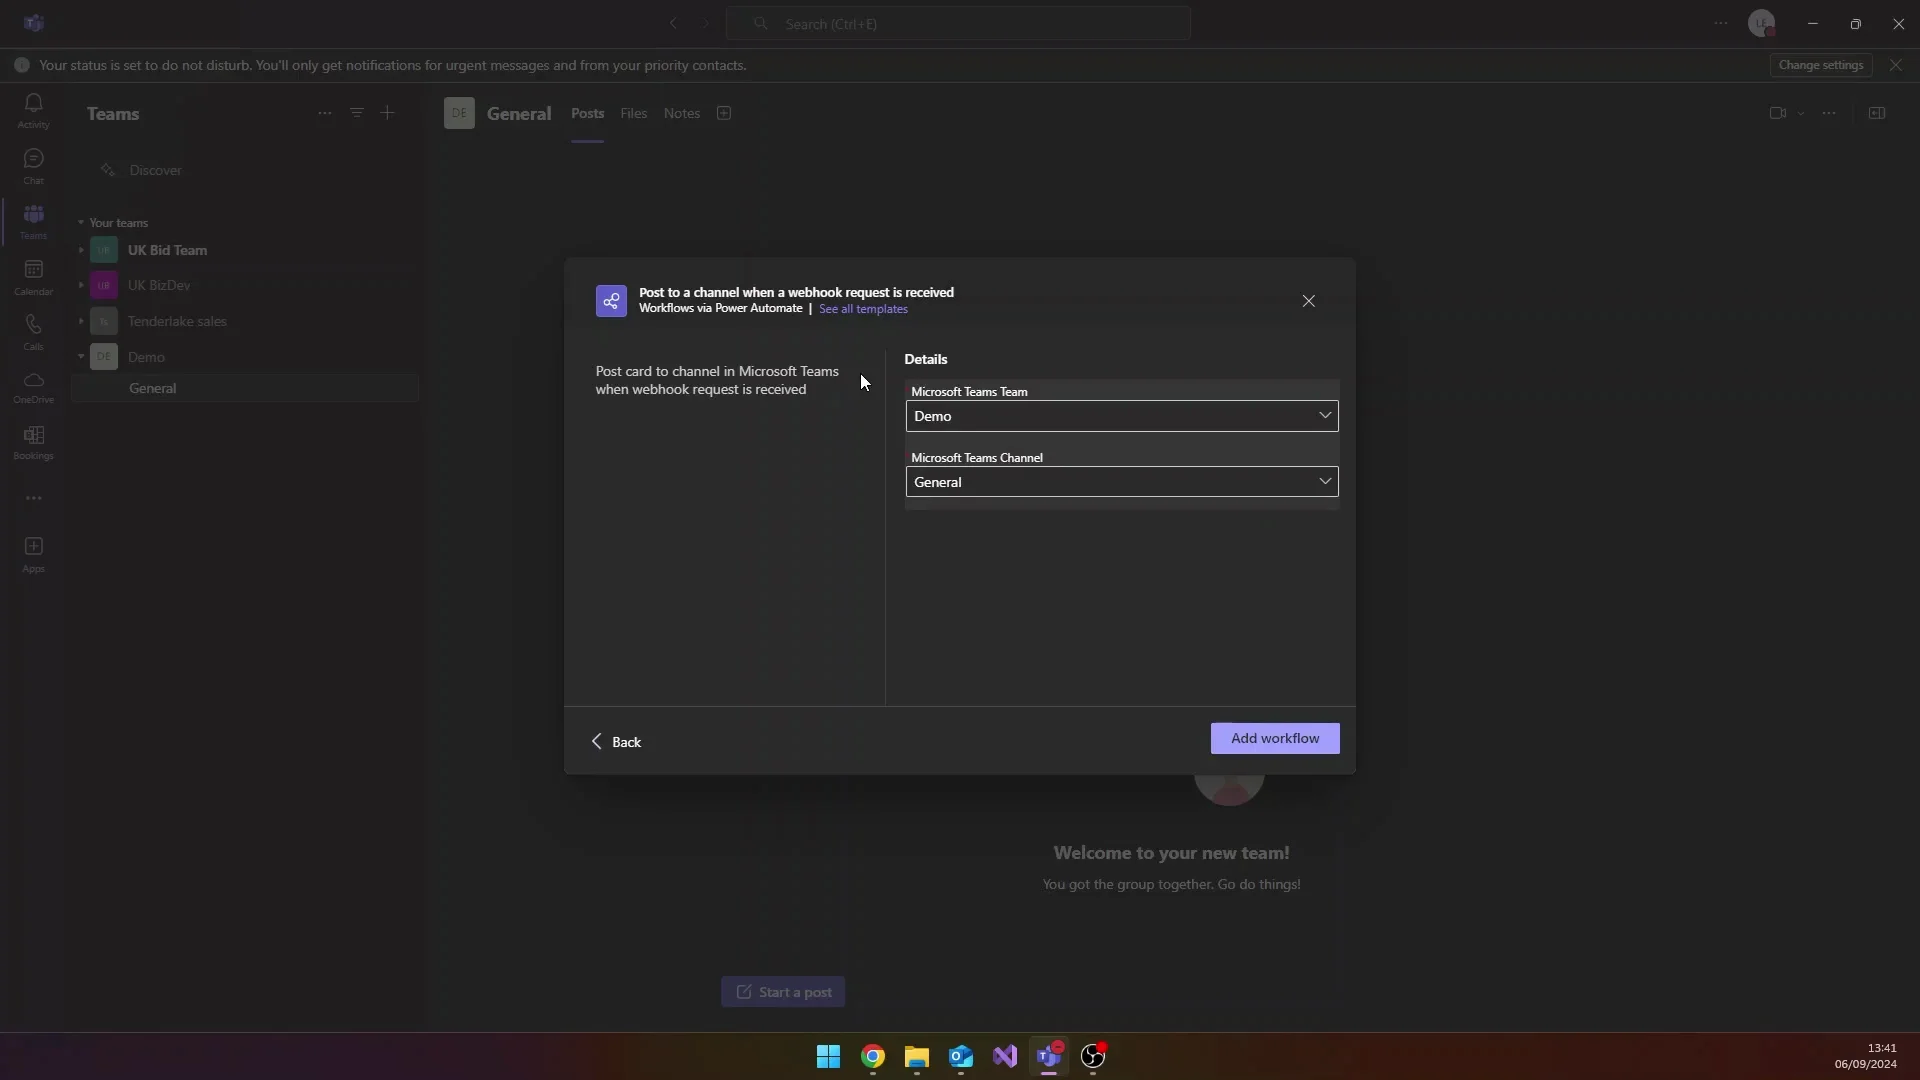
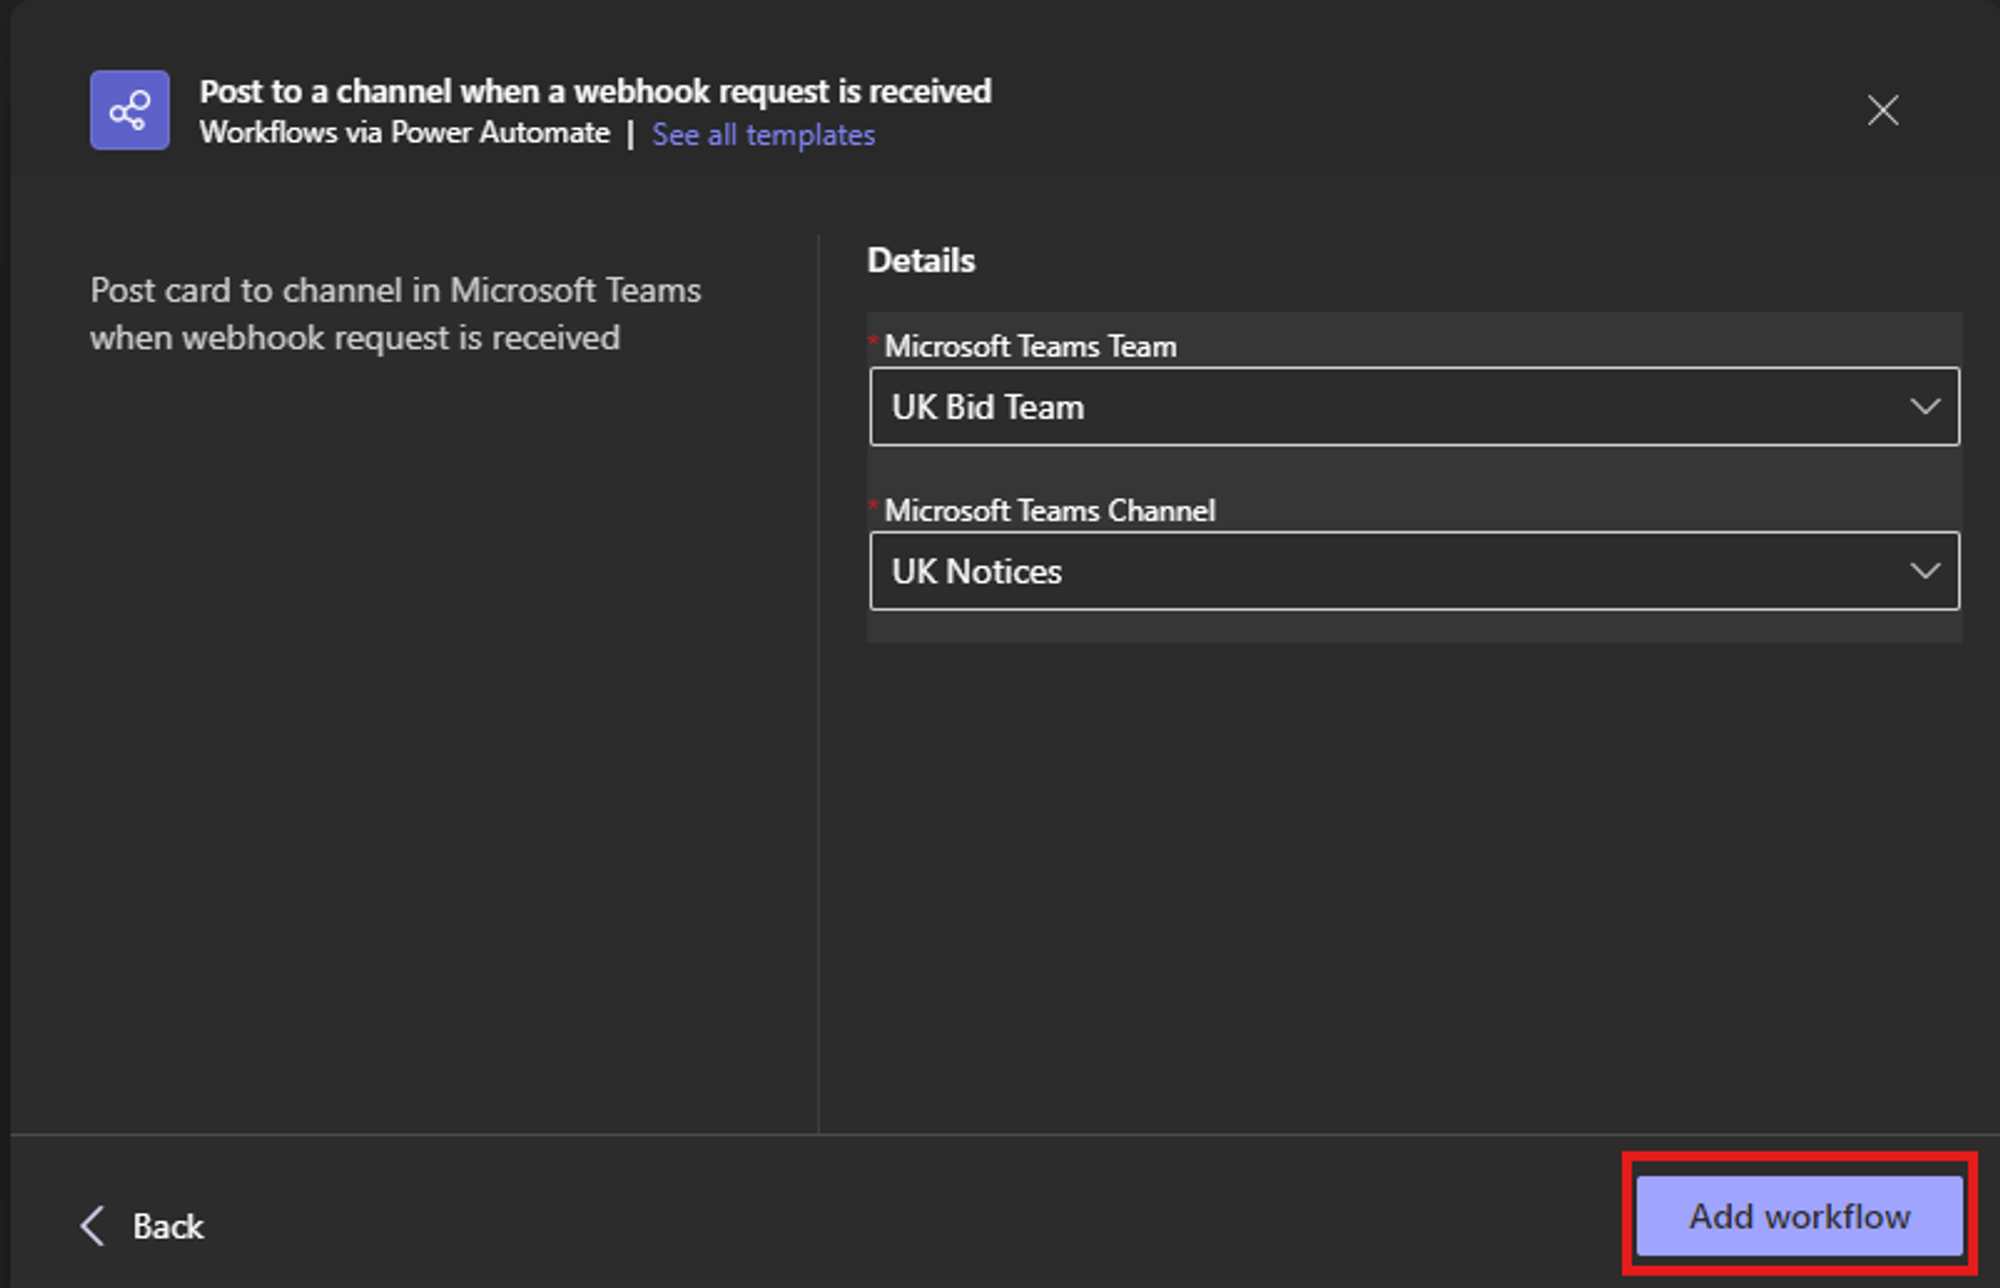
4/
Next, confirm you want to add the webhook to this Team and this Channel by clicking the "Add Workflow" button at the bottom right of the pop-up window.
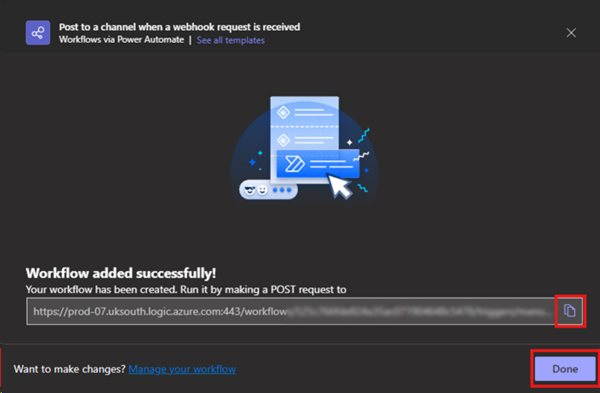
5/
Once you’ve created the new Workflow, ensure you copy the POST URL by clicking the Clipboard icon next to the URL.
You can save the link temporarily in a Windows Notepad file or somewhere so you don’t lose it.
6/
Now, login to Tenderlake, then navigate to "Distribution" in the left-hand menu and select "Connectors".
Click on “Add Microsoft Teams Webhook”
7/
Paste the webhook link you copied from Microsoft Teams and give the webhook a name.
A good name is the name of the Channel. (You can change the name later if you want.)
Save the webhook name.
8/
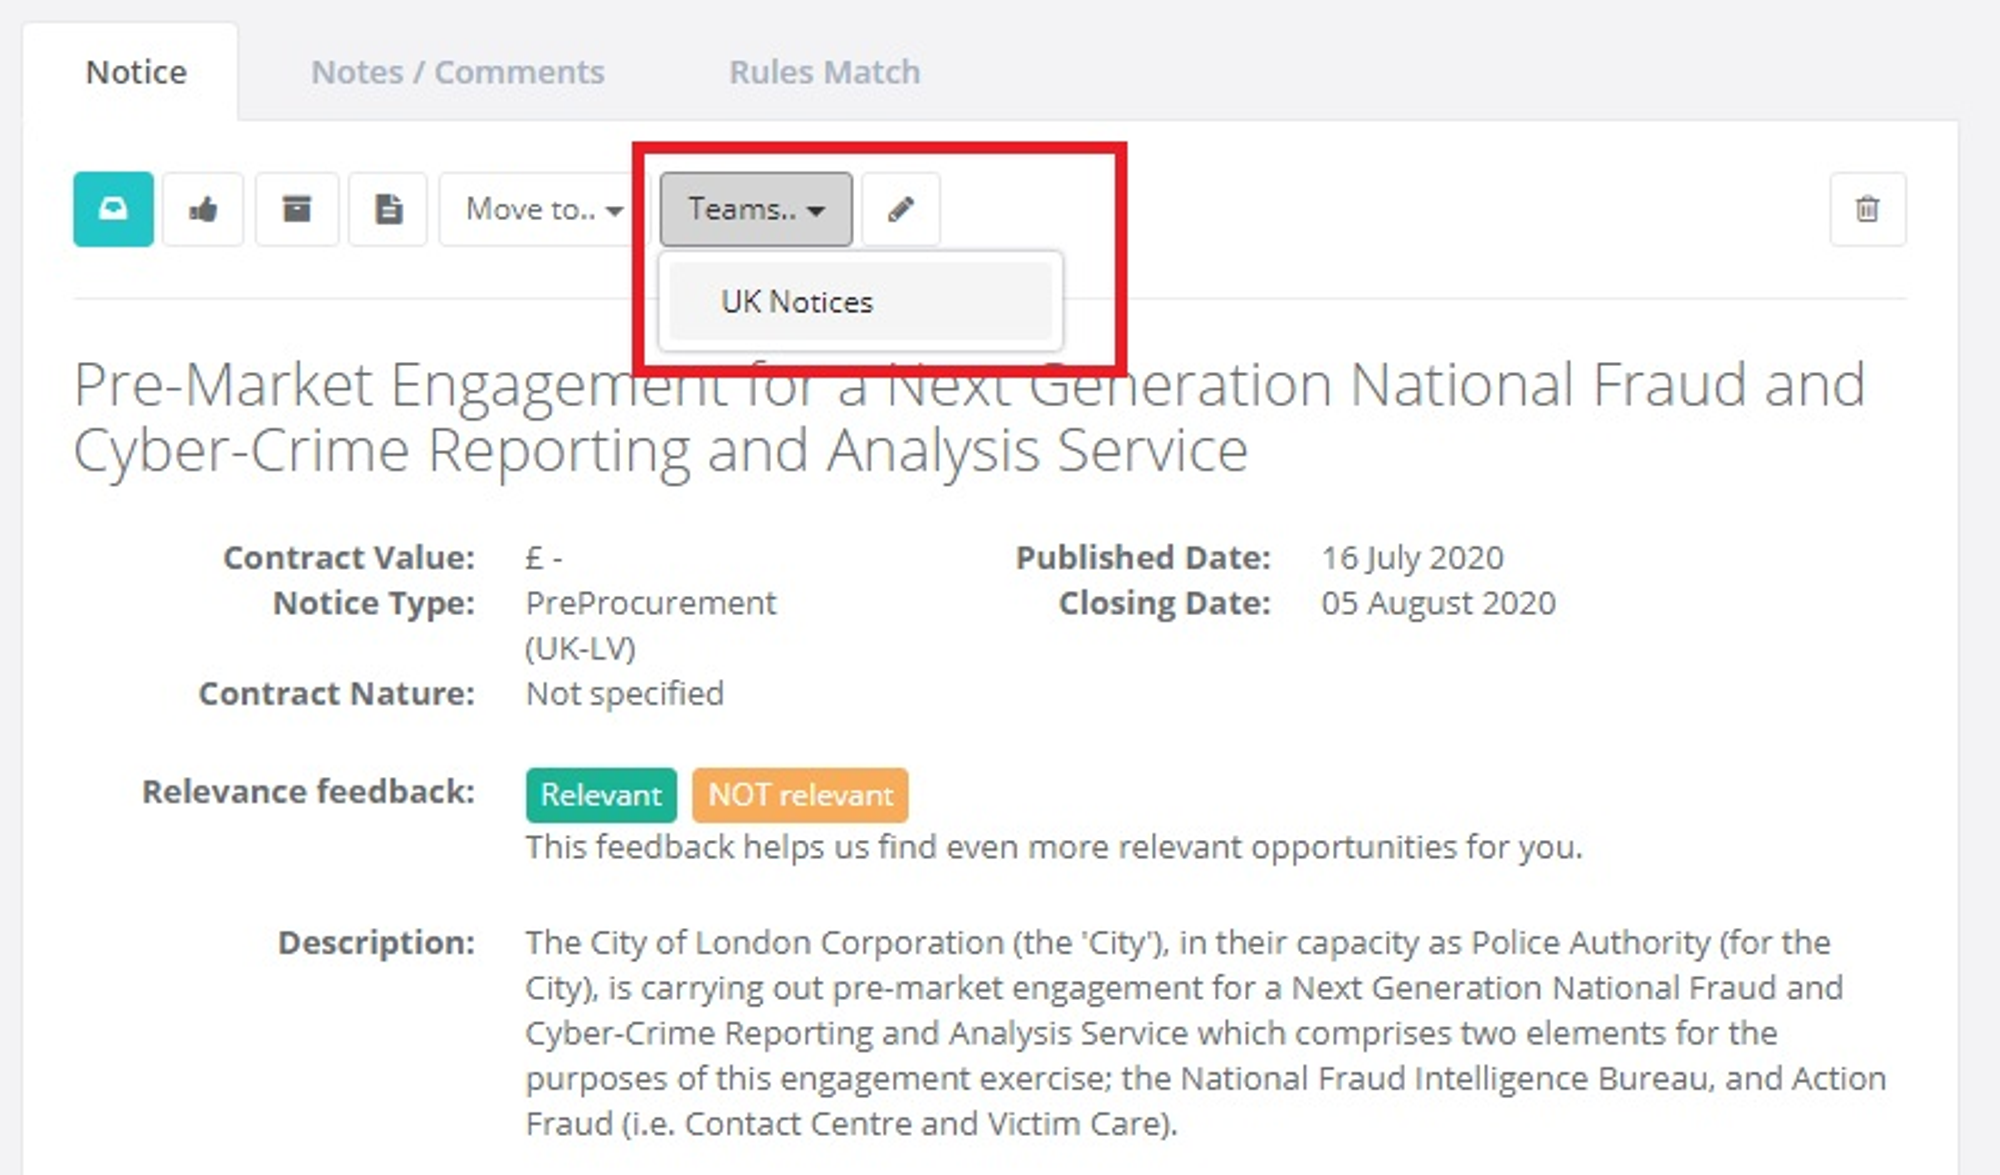
Now you are ready to post your notices to the channel.
Every time you view a notice, there is now a “Teams..” button, which shows the channels you can post the notice to.
Try it out and post a notice to your channel.
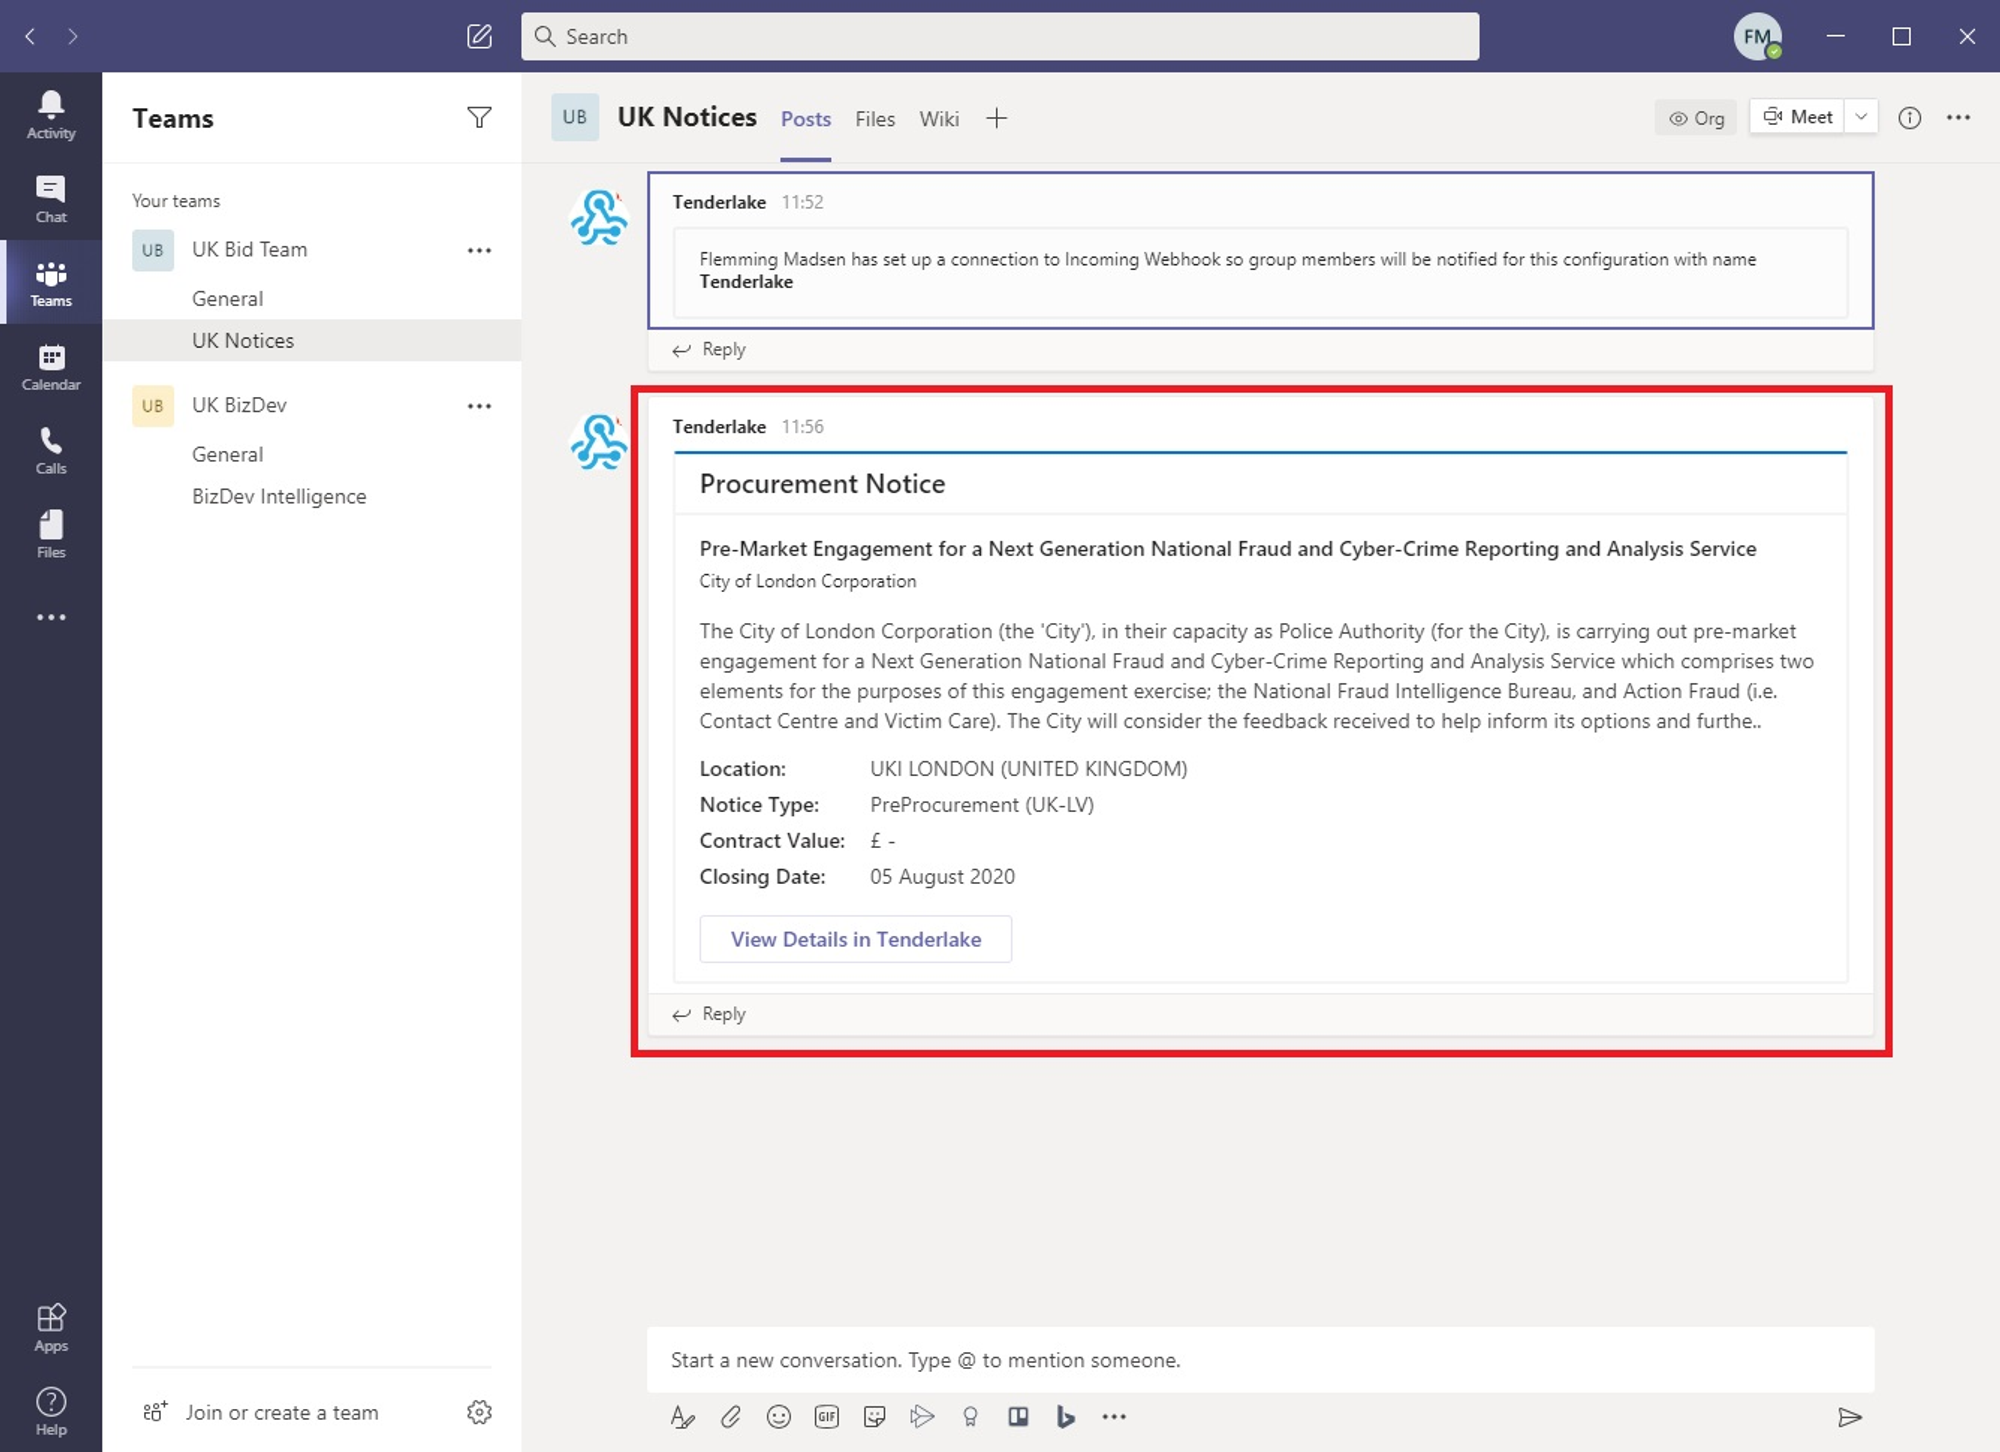
9/
The notice now appears in the selected Teams channel, displaying key information from the notice. Full details can be viewed by clicking the “View Details in Tenderlake” button.
Please note: This functionality will not work in a private channel because the Workflow lacks the required permissions to post. Ensure the Channel is set to 'Standard' or 'Shared'.
If you want to set up Automatic Distribution of Tenders to Microsoft Teams using your new Workflow, you can follow our guide here.
If you have any questions or need assistance with this process, please get in touch.